
You’ve taken the time to brainstorm, strategize, and build your digital campaign. You’re now able to see how people are interacting with your ads. But what about the campaigns that drive traffic to your website? Ever curious about what actions users who clicked on ads are taking?
Tracking actions, such as button clicks or form submission, on your website can inform you a lot about web visitors. It signals an activation of interest in your services or products. To track actions, you will want to have a Google Tag Manager account. Tags are segments of code that you can configure and track actions like button clicks. With tags, you can track how many times a button for Australia trips is clicked or see how far down on a Travel Package page a user scrolls down.
This article will focus on how to track a form in Google Tag Manager and how to monitor the tracking in Google Analytics.
Form Tracking in Google Analytics
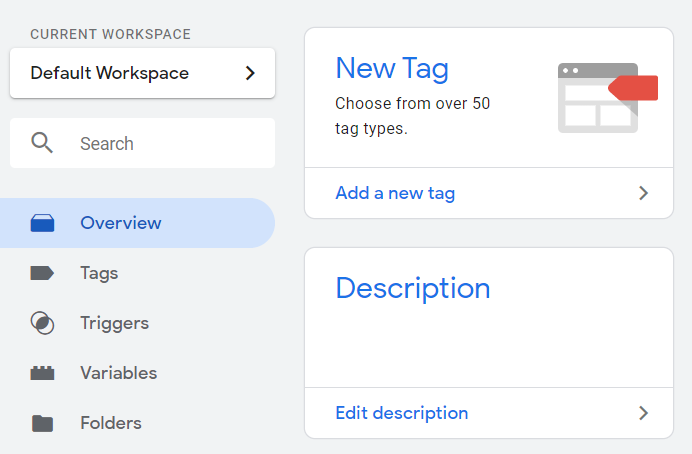
Step 1: Create new tag
- Under Tag Configuration, select Google Analytics: Universal Analytics tag type
- Track Type: Event
- Event Tracking Parameters: Here you will create how Google will identify the tag. What you put into these fields will be how to find this tag in Analytics, so make sure it is clear what you are tracking.
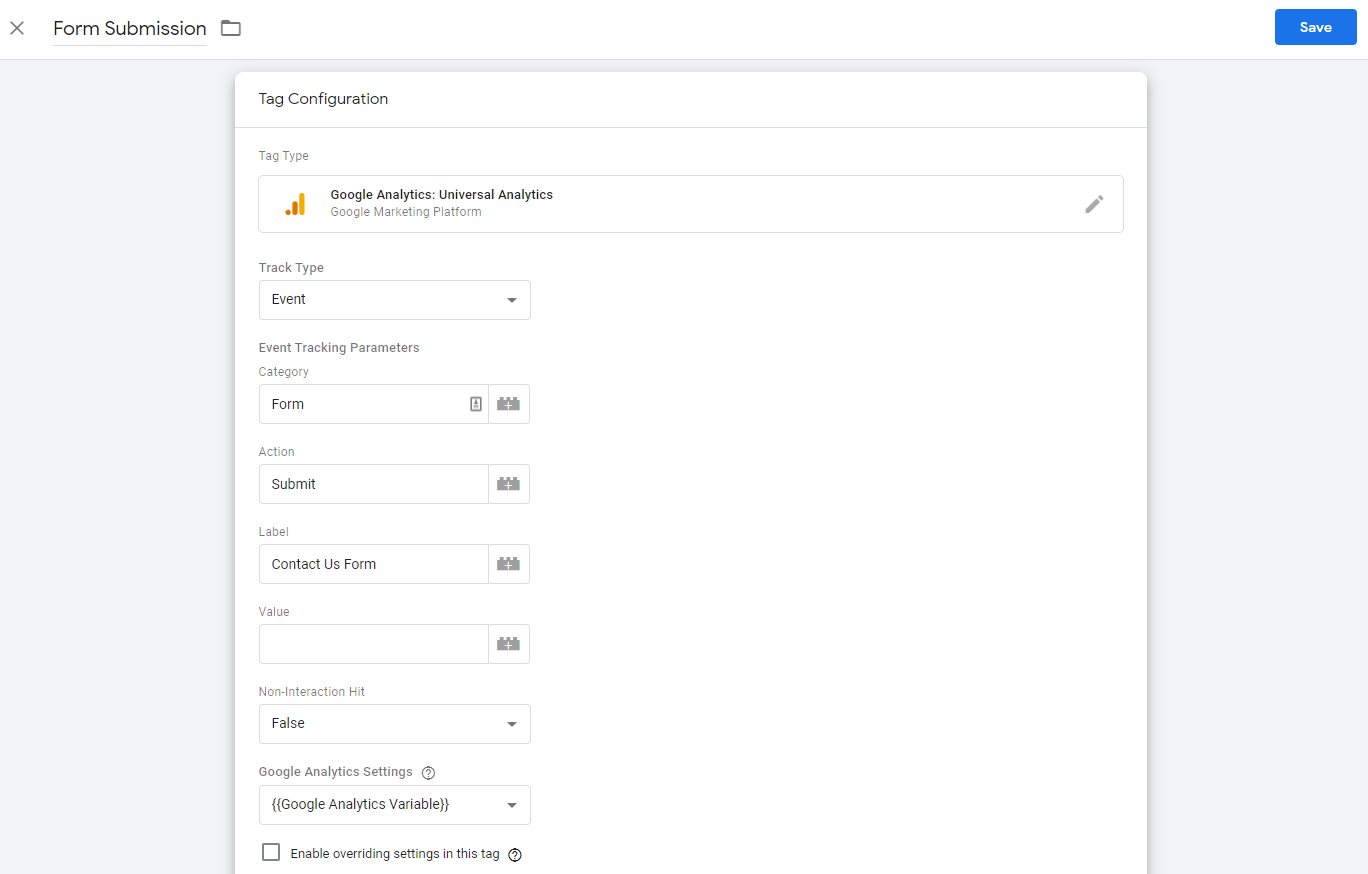
- Under Google Analytics Settings, select your Google Analytics Tracking Variable.
- If you don’t have one set up in Tag Manager, select New Variable on the drop-down list. Name the variable “Google Analytics Tracking ID” and add the tracking code to the Tracking ID field. To find the tracking code, open a new tab and go to Analytics, Admin Settings, Property Settings, Tracking Info, and select Tracking Code.
Step 2: Create new trigger

- Select Form Submission as the trigger
- Select Some Forms
- Here is where you determine how the trigger will fire. For form submissions, there are a few ways to accomplish this. One way is to find the form ID within the web page code.
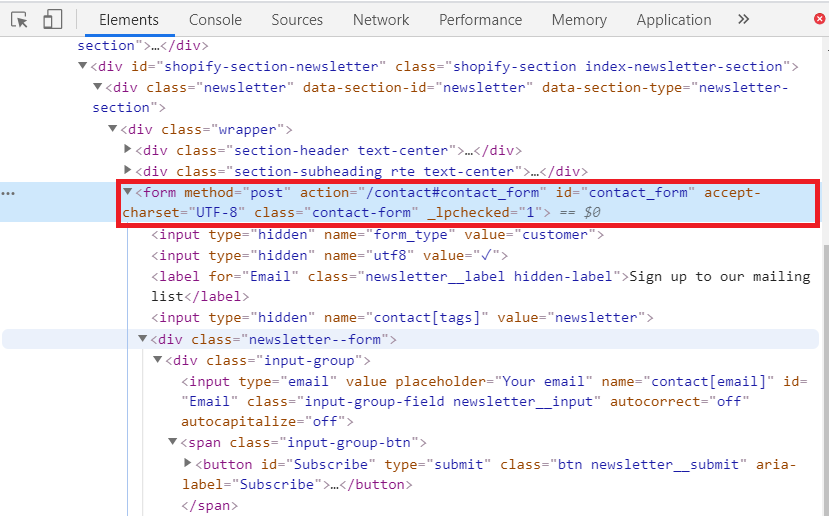
- Open a new tab and navigate to the page that has the form you want to track. Right click on the form and click on Inspect. This will open up the site code. You want to search for where the code refers to the form. It should be encompassed within a <form> section.
- Look for id = “contact_form ” or class = “contact-form” that falls within the <form> section
- Copy the text within the “ ”
-
- Set the trigger to fire whenever the Form ID contains “contact_form”

- If you don’t see any Form variables, you will need to enable variables in the list of built-in variables. To do so, click on Variables on the left sidebar, click on the Configure button under the Built-In Variables section, and select the variables you would like to turn on.
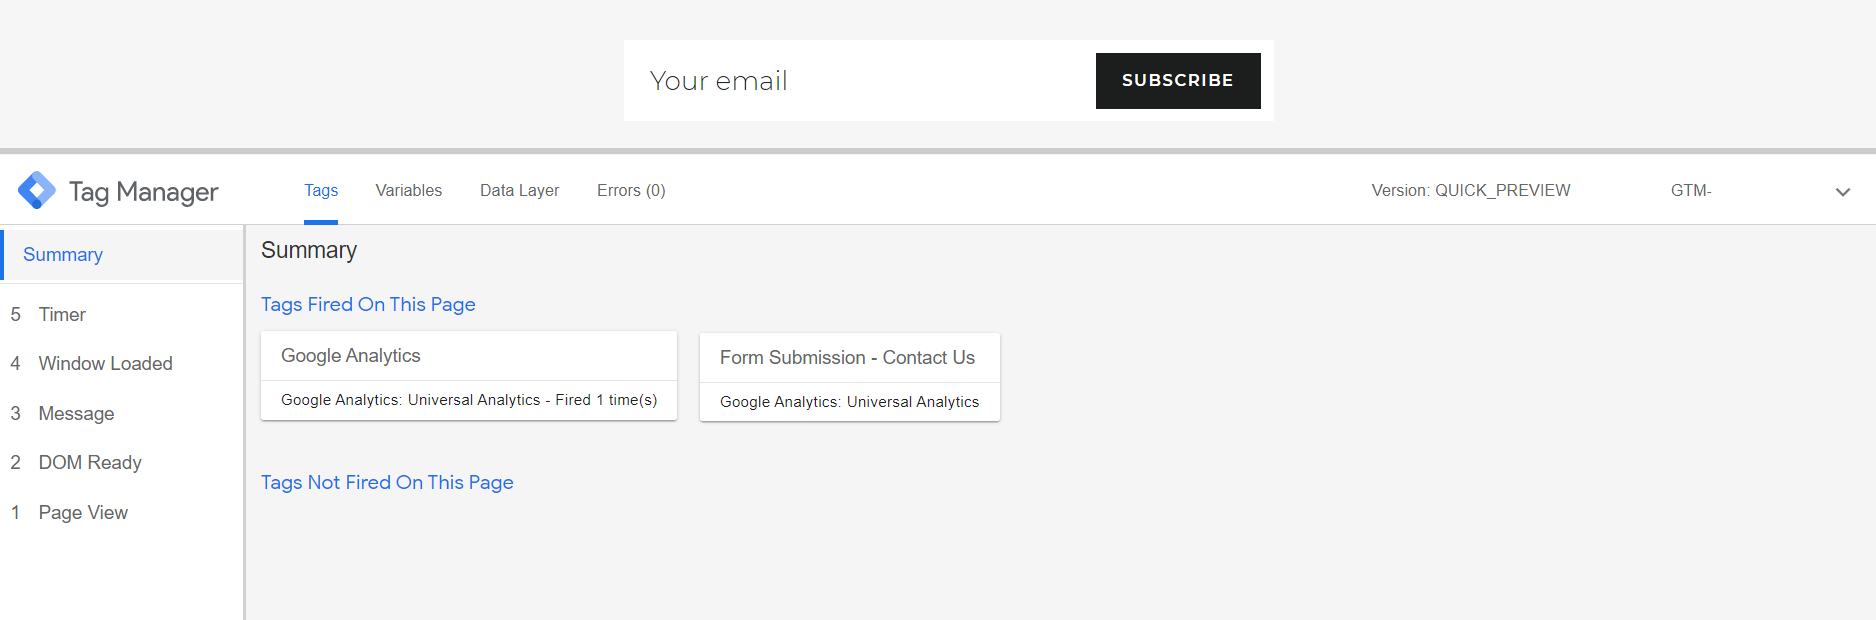
Step 3: Testing the Tag
- Go back to the Tag Manager Dashboard
- Click on the Preview button on the top right – this puts your browser into Debug Mode

- Open the web page with the form you want to track in a new tab
- A second window should pop up on the bottom half of the web page. If not, then there is an issue with the way the Analytics tag was set up.
- Test the tag by filling out the form and checking to see if the tag moves from the Not Fired section to the Tags Fired section

Step 4: Publish
- After testing successfully, click on the Publish button (next to the Preview button) and write a description of the tag. Now tracking is live on the form!
Step 5. Create Goal in Analytics
- In Analytics, click on the Admin Settings button (looks like a gear switch) on the bottom left sidebar
- Select the correct Account, Property, and View where you want to create and track the goal. Under View, click on the Goals option.
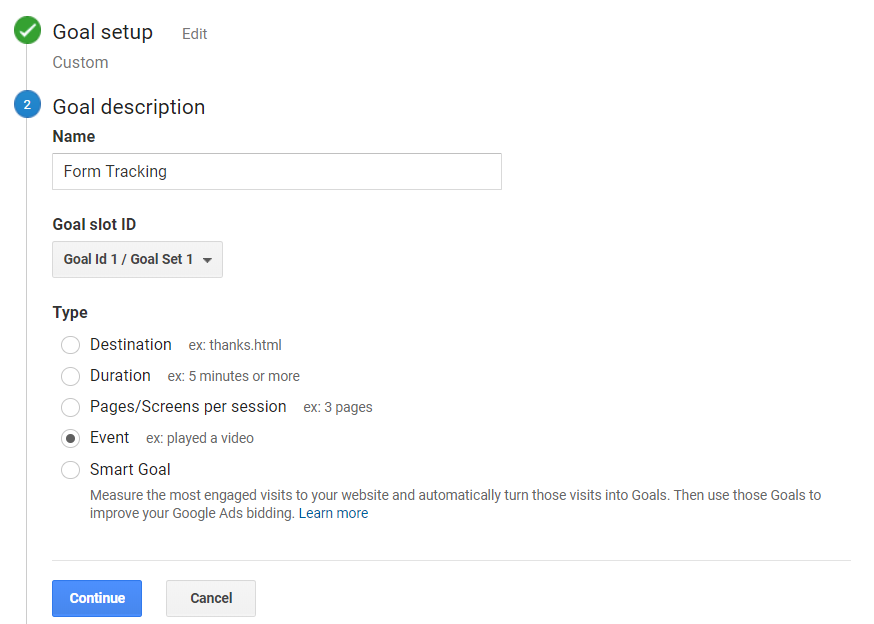
- Create a new Goal
- Select Custom
- Name your Goal
- Select Event as your Goal Type
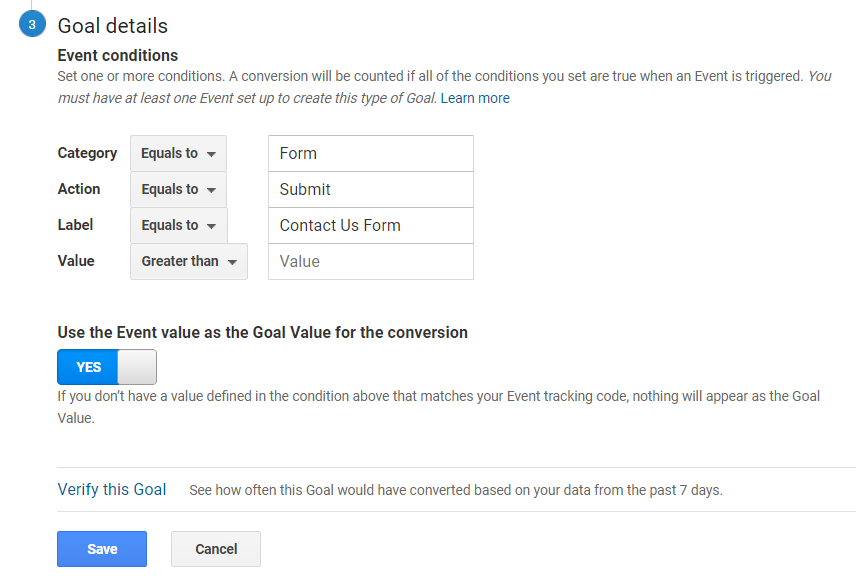
- Goal Details is where you add the details for the tag you created. It is case sensitive so make sure that you input the exact information on the tag to the goal.
- Keep the Event Value as Conversion turned on
Step 6. Monitoring After Tag is Live
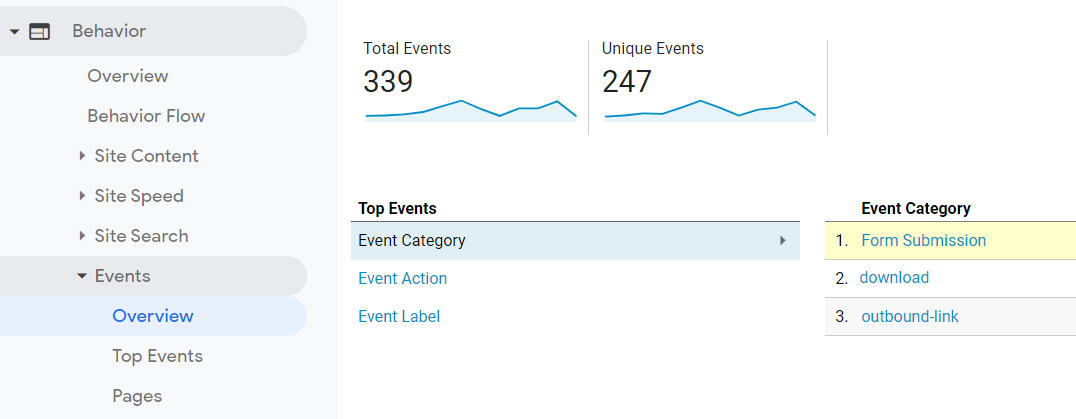
- Under Behavior, click on Events > Overview
- Here you can monitor your new tag. Click on Event Label to identify the form and see how often the form is submitted.